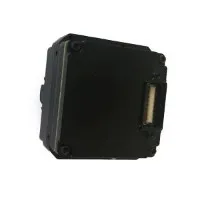

Hey there! As a supplier of LWIR Camera Cores, I often get asked about how to calibrate these nifty little devices. Calibration is super important for getting accurate and reliable thermal images, so I thought I'd share some insights on the process.
First off, let's talk about why calibration is a big deal. LWIR (Long-Wave Infrared) cameras detect the infrared radiation emitted by objects and convert it into visible images. However, various factors can affect the accuracy of these images, like temperature variations, sensor non-uniformities, and changes in the environment. Calibration helps to correct these issues and ensures that the camera provides consistent and precise results.
Understanding the Basics of Calibration
Before we dive into the calibration process, it's essential to understand a few key concepts. There are two main types of calibration for LWIR camera cores: non-uniformity correction (NUC) and radiometric calibration.
Non-uniformity correction is all about compensating for the differences in sensitivity between individual pixels in the camera's sensor. Even though the sensors are designed to be as uniform as possible, there are always slight variations. These variations can cause fixed-pattern noise in the thermal images, making them look grainy or having uneven brightness. NUC helps to remove this noise and improve the overall image quality.
Radiometric calibration, on the other hand, is used to convert the camera's output (usually in digital counts) into actual temperature values. This is crucial for applications where you need to measure the temperature of objects accurately, like in industrial inspections or medical diagnostics.
Non-Uniformity Correction (NUC)
Let's start with NUC. There are a few different methods for performing NUC, but one of the most common is the two-point calibration method. Here's how it works:
-
Step 1: Capture a Dark Frame
- First, you need to cover the camera lens with a light-tight cap to block all incoming infrared radiation. This creates a "dark" image where the only signal the sensor is detecting is its own internal noise.
- Take a few frames with the lens covered and average them to reduce random noise. This averaged dark frame will be used later in the calibration process.
-
Step 2: Capture a Uniform Scene
- Next, you need to expose the camera to a uniform infrared source, like a blackbody radiator. A blackbody is an object that emits infrared radiation at a known and constant temperature.
- Make sure the blackbody is large enough to fill the camera's field of view and that it's at a stable temperature. Take a few frames of the blackbody and average them as well.
-
Step 3: Calculate the Correction Factors
- Now that you have the dark frame and the uniform scene frame, you can calculate the correction factors for each pixel. The correction factor for a pixel is the difference between the average value of that pixel in the uniform scene frame and its average value in the dark frame.
- These correction factors are then stored in the camera's memory and applied to every subsequent image to correct for non-uniformities.
-
Step 4: Apply the Correction
- When the camera is taking normal images, it uses the stored correction factors to adjust the values of each pixel in real-time. This ensures that the final image has a more uniform brightness and reduced fixed-pattern noise.
Radiometric Calibration
Radiometric calibration is a bit more complex than NUC, but it's essential for accurate temperature measurements. Here's a general overview of the process:
-
Step 1: Select a Calibration Target


- You'll need a calibration target with a known and stable temperature. This could be a blackbody radiator or a calibrated reference object.
- Make sure the calibration target covers a significant portion of the camera's field of view and that it's at a temperature within the range of the camera's operating specifications.
-
Step 2: Take Measurements
- Expose the camera to the calibration target at different temperatures. You'll need to take multiple measurements at each temperature to ensure accuracy.
- Record the camera's output (digital counts) for each measurement along with the corresponding temperature of the calibration target.
-
Step 3: Create a Calibration Curve
- Using the recorded data, you can create a calibration curve that relates the camera's output to the actual temperature. This curve is usually a polynomial function that can be used to convert the camera's digital counts into temperature values.
- The calibration curve needs to be updated periodically to account for changes in the camera's performance over time.
-
Step 4: Apply the Calibration
- Once you have the calibration curve, you can apply it to every image taken by the camera. The camera's software will use the curve to convert the digital counts of each pixel into temperature values, allowing you to measure the temperature of objects in the scene accurately.
Tips for Successful Calibration
Here are some tips to help you get the best results when calibrating your LWIR camera cores:
-
Use High-Quality Equipment
- Make sure you're using a high-quality blackbody radiator or calibration target. The accuracy of your calibration depends on the accuracy of these reference sources.
- Also, use a light-tight lens cap for capturing the dark frame to ensure that no external infrared radiation is leaking in.
-
Control the Environment
- Try to perform the calibration in a stable environment with a constant temperature and humidity. Changes in the environment can affect the camera's performance and the accuracy of the calibration.
- Avoid calibrating the camera near sources of electromagnetic interference or other sources of noise.
-
Follow the Manufacturer's Instructions
- Every LWIR camera core is different, so it's important to follow the manufacturer's instructions for calibration. The manufacturer may have specific requirements or procedures that you need to follow to ensure accurate calibration.
Conclusion
Calibrating LWIR camera cores is a crucial step in getting accurate and reliable thermal images. By performing non-uniformity correction and radiometric calibration, you can improve the image quality and measure temperatures accurately. Remember to use high-quality equipment, control the environment, and follow the manufacturer's instructions for the best results.
If you're in the market for high-quality LWIR camera cores, we've got you covered. Check out our 640 Thermal Camera Cores, Thermal Imaging Module, and Uncooled Thermal Imaging Core products. We're always happy to help with any questions you may have about calibration or our products. If you're interested in purchasing our LWIR camera cores or discussing your specific needs, don't hesitate to reach out to us. We're looking forward to working with you!
References
- "Infrared and Electro-Optical Systems Handbook: Volume III - Electro-Optical System Design," SPIE Press.
- "Thermal Imaging: Principles, Research, and Applications," CRC Press.