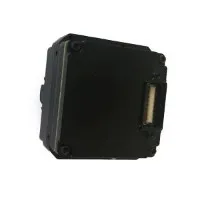

As a supplier of LWIR Camera Cores, I understand the importance of firmware upgrades for the optimal performance of these advanced imaging solutions. In this blog post, I'll share a comprehensive guide on how to upgrade the firmware of LWIR Camera Cores, covering everything from understanding the need for upgrades to the step - by - step process and post - upgrade considerations.
Why Firmware Upgrades Matter
Firmware is the software that runs on the hardware of your LWIR Camera Core. It controls various functions such as image processing, image quality, and communication protocols. Upgrading the firmware can bring several benefits:
- Improved Performance: New firmware versions often include optimizations for better image quality, higher frame rates, and reduced noise. For example, advanced algorithms can enhance the clarity of thermal images, making it easier to detect and analyze objects in different environments.
- Enhanced Features: Manufacturers may introduce new features with firmware updates. These could include additional image modes, such as false - color palettes for better visualization, or improved connectivity options like support for new communication interfaces.
- Bug Fixes and Security Patches: Firmware upgrades can address known bugs and vulnerabilities. Fixing software glitches can prevent issues like image artifacts or system crashes, while security patches protect your camera core from potential threats.
Checking the Compatibility
Before you start the firmware upgrade process, it's crucial to ensure that the new firmware is compatible with your specific LWIR Camera Core model. Each camera core has unique hardware and software requirements, and using an incompatible firmware can lead to problems or even render the device inoperable.
- Identify Your Camera Core Model: Look for the model number on the camera core itself or in the product documentation. You can also check the device settings if there is an option to display the model information.
- Visit the Manufacturer's Website: Go to the official website of the LWIR Camera Cores manufacturer. Navigate to the support or download section, where you'll typically find a list of available firmware versions. Here, you can select the appropriate firmware based on your camera core model. Our company offers firmware downloads for LWIR Camera Cores on our official website, and we provide detailed instructions for each version.
Preparing for the Upgrade
Once you've confirmed the compatibility, it's time to prepare for the upgrade. This involves gathering the necessary tools and creating a backup if possible.
- Gather the Required Tools: You'll need a computer with a stable internet connection and the appropriate software to perform the upgrade. Some camera cores may require a specific programming cable or a USB adapter to connect to the computer. Make sure you have all the required cables and adapters on hand.
- Backup Your Data: If your LWIR Camera Core stores any data internally, such as calibration settings or custom configurations, it's a good idea to back them up. Check the product documentation for instructions on how to perform a backup. This ensures that you can restore your settings in case something goes wrong during the upgrade.
Step - by - Step Firmware Upgrade Process
The following is a general step - by - step guide for upgrading the firmware of LWIR Camera Cores. Note that the exact process may vary depending on the model and manufacturer.
- Download the Firmware: As mentioned earlier, visit the manufacturer's website and download the appropriate firmware file for your camera core. Make sure to save it to a location on your computer where you can easily access it.
- Connect the Camera Core: Use the appropriate cable or adapter to connect the LWIR Camera Core to your computer. Ensure that the connection is stable and that the camera core is powered on.
- Run the Upgrade Software: Many camera core manufacturers provide dedicated software for firmware upgrades. Install and run this software on your computer. Follow the on - screen instructions to locate the firmware file you downloaded earlier.
- Start the Upgrade: Once you've selected the firmware file, the software will usually prompt you to confirm the upgrade. Double - check that all the information is correct and then start the upgrade process. The software will transfer the new firmware to the camera core, which may take several minutes depending on the size of the firmware file.
- Monitor the Upgrade Progress: Keep an eye on the upgrade progress indicator provided by the software. Avoid interrupting the process by disconnecting the camera core or shutting down the computer during the upgrade. If there are any error messages, refer to the manufacturer's troubleshooting guide.
- Complete the Upgrade: Once the upgrade is finished, the software will typically notify you. Disconnect the camera core from the computer and power it off and then on again. This allows the camera core to boot up with the new firmware.
Post - Upgrade Checks
After the firmware upgrade, it's important to perform some checks to ensure that the camera core is working properly.


- Verify the Firmware Version: Many camera cores have a setting menu where you can view the current firmware version. Check this to confirm that the upgrade was successful and that the new firmware version is installed.
- Test the Camera Core Functions: Conduct a series of tests to verify that all the functions of the camera core are working as expected. This includes checking the image quality, testing different image modes, and verifying the connectivity. For example, if the new firmware introduced a new false - color palette, test it out to see if it provides the desired visualization.
- Update Other Related Components: In some cases, you may need to update other related components such as the camera core's drivers on your computer or the software on a connected device. Refer to the manufacturer's documentation for information on any additional updates that may be required.
Troubleshooting Common Issues
Even with a careful upgrade process, you may encounter some issues. Here are some common problems and their possible solutions:
- Upgrade Failure: If the upgrade fails, first check the connection between the camera core and the computer. Make sure the cables are properly plugged in and that there are no loose connections. You can also try downloading the firmware file again and restarting the upgrade process.
- Image Quality Degradation: In some cases, the image quality may seem worse after the upgrade. This could be due to incorrect calibration settings. Try resetting the calibration settings to their defaults and then fine - tuning them again if necessary.
- Connectivity Issues: If the camera core has trouble connecting to other devices after the upgrade, check the communication settings. Make sure that the camera core is configured to use the correct communication protocol and that all the devices are compatible with the new firmware.
Conclusion
Upgrading the firmware of LWIR Camera Cores is a crucial process that can significantly enhance the performance, features, and security of your imaging device. By following the steps outlined in this guide, you can ensure a smooth and successful firmware upgrade.
If you're interested in 640 Thermal Camera Cores or LWIR Micro Thermal Camera Module, or if you have any questions about firmware upgrades or our LWIR Camera Cores, we invite you to contact us for further details and procurement discussions. We're committed to providing high - quality products and excellent support services.
References
- Manufacturer's documentation for LWIR Camera Cores
- Technical support articles on LWIR Camera Cores firmware upgrades